I am accomplishing two things this summer. One, I am working on binding. I had a mad post about binding here. That was back in Nov 2012 - when I went searching for the post, I thought it was only a couple of months ago.
Two, I am finishing things that just have one or a few more steps and finito.
I read your tips on binding and I read some more on line and this is what is working for me right now, I still have to tighten up my neatness factor, but I am much improved in the corners. I practiced on this quilt which was already quilted, just needed binding. For four years. Yes, four. (I am really a procrastinator.) That's how things sit that are for myself.
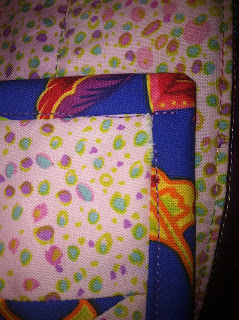
This photo above is not the best, but I think you can see how when I come to a corner, I go off the edge at an angle now. This is done at 1/4" from the edge of the quilt.
Next you fold the binding along the angled stitch and fold back down again to start along the next edge of quilt. Some quilters said to back stitch and start a new thread line. I just pull out extra thread, and don't bother with cutting it. You are going to sew over that angled stitch to secure it. I do secure my new line of stitches with a couple of back stitches.
I am using a walking foot and and attaching the binding to the front of the quilt. I was previously attaching to the back and wrapping it around the front. This allowed me to make the front look neat where I was stitching down the binding on the front, but the corners looked worse.
When all the binding is attached, I fold it over the quilt and secure with binding clips ( I use Wonderclips)
I machine stitch down my binding, and this is how the front looks. I need more practice at hitting the front edge of the binding when stitching it down, but I am pleased with my progress. You can see where I have mostly hit the binding edge with the stitch line - this has been stitched from the back, so I don't see where my bobbin line is hitting. (there is a bit of fray in this photo I have to stitch down)
This was a group bee quilt, we each had a piece of the same fabric (the one I used for the binding), there were 12 of us in the group. We each made 12 blocks and then gave one to each person in the group. You made your quilt as you wanted. When we were all done the different quilts were amazing!
The binding only took me about an hour to attach, even going slow in the corners, so I'm not sure why I made this wait so long! It's washed and been used on the sofa, and it's a nice reminder of my friends working together.
Best corner on this quilt.
I have a few more items like this, started long ago and not forgotten, but really put off until some time in the future. I'll be working on these through the summer and also new things.
Here are some places you can find my photos and progress:
I am FairlyMerry on both those sites. I put progress photos on Instagram, and so do a lot of your other favorite quilters and crafters. It's fun to see things in progress. But I will always try to add more photos to the blog.
Speaking of that, you can find my blog on
Linking up with Blossom Heart Quilts for Finished Friday


2 comments:
That is a lovely quilt. When I machine bind, I follow Marianne from the The Quilting Edge's tutorials. You could do what you do up to the sewing part. At that part, stitch on the front in the ditch and you will catch the back as you go, so from the front it looks the same as a handsewn binding. I hope you put some of those finishes you plan on a Q3 FAL list.
♥
Post a Comment